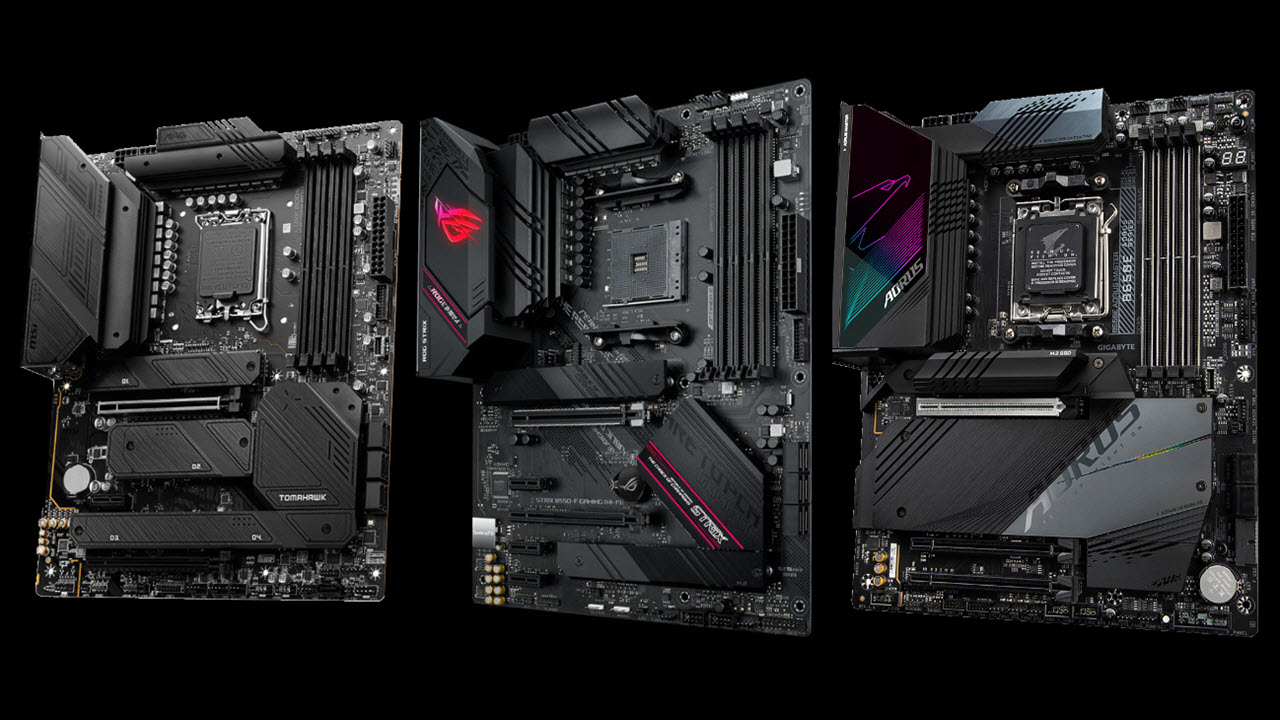
Specialized Motherboard
How to Check Your PC Motherboard – A Complete Guide!

You can check your PC motherboard using system tools like System Information or third-party software like CPU-Z. This helps identify the motherboard model, manufacturer, and specifications needed for upgrades or troubleshooting.
Your PC’s motherboard is the backbone of your system, connecting all the hardware components. Knowing the exact details of your motherboard can be crucial, especially when upgrading or troubleshooting. Here’s a guide on how to check your PC’s motherboard using different methods.
Why Should You Check Your Motherboard?
Checking your motherboard details is important for several reasons. If you’re planning to upgrade your processor, RAM, or storage, you’ll need to make sure these components are compatible with your motherboard. Additionally, knowing your motherboard model is useful for installing firmware updates, drivers, or simply troubleshooting performance issues.
Using System Information:
Windows has a built-in tool called System Information that allows you to easily find out your motherboard details. You can access this tool by searching for “System Information” in the Start menu. Once the window opens, look for sections labeled BaseBoard Manufacturer and BaseBoard Product. This will show you the manufacturer and model of your motherboard.This method is simple and does not require any additional software.
Using Command Prompt:
Another way to check your motherboard information is by using the Command Prompt. Although it may sound technical, it’s a straightforward process. You just need to type a command that gives you a list of system hardware, including your motherboard details. The information will include the manufacturer, model, and sometimes even the serial number.This method is useful if you prefer a quick, text-based solution to check hardware.
Read More: Where ASUS Motherboard is Made – A Look at Global Manufacturing!
Third-Party Software:
If you want more in-depth details about your motherboard, you can use third-party software. Tools like CPU-Z or Speccy are popular and user-friendly options. These programs will not only provide motherboard details, but also other hardware information like your CPU, RAM, and GPU.
These programs are especially helpful if you need detailed specs for upgrading components or optimizing performance.
Physically Checking the Motherboard:
If you’re comfortable opening up your PC case, you can physically check your motherboard for model information. After turning off and unplugging your computer, open the case to locate the motherboard. You’ll typically find the model number printed near the CPU socket or between the RAM slots. Make sure to check in well-lit conditions, as the print can be small. This method is particularly useful if your PC isn’t booting and you can’t access the system information through software.
Using BIOS or UEFI:
Another effective way to check your motherboard details is through the BIOS or UEFI settings. Restart your computer and press the designated key (often F2, Delete, or Esc) to enter the BIOS. Once inside, you can find your motherboard’s model and manufacturer details in the system information section.This method is ideal when you need to check your motherboard during system troubleshooting or before performing hardware upgrades.
When Should You Check Your Motherboard?

There are a few common scenarios where you should check your motherboard’s details:
- Before upgrading hardware: Ensure your new components are compatible with your current motherboard.
- For troubleshooting purposes: If you’re experiencing system instability or crashes, checking your motherboard can help identify potential compatibility or hardware issues
- Before upgrading components: Ensuring compatibility with new hardware is key, especially for CPU, RAM, and GPU upgrades. Different motherboards support different CPU socket types, RAM configurations, and GPU slots, so verifying your motherboard specifications before upgrading is a must.
- BIOS updates: Updating the BIOS or UEFI on your motherboard can improve system performance and compatibility with newer hardware. However, this process requires knowing your exact motherboard model.
- Troubleshooting hardware issues: If your PC is experiencing instability, checking the motherboard for compatibility or malfunctions can be the first step toward diagnosing the problem.
What Information to Look for in Your Motherboard?
When you check your motherboard, there are several key pieces of information you should note:
- Motherboard Manufacturer: This tells you who produced your motherboard, such as ASUS, MSI, or Gigabyte.
- Model Number: The specific model of your motherboard is essential for finding compatible components and updates.
- Socket Type: This is crucial for CPU upgrades. Common types include LGA1151, AM4, and others, each compatible with different CPU generations.
- Chipset: The chipset controls communication between your CPU, memory, and peripherals. Knowing this can help you choose the right upgrades.
- Expansion Slots: The number and type of PCIe slots available can determine what GPUs or expansion cards your motherboard can support.
Read More: Asus Motherboard Drivers – What You Need to Know for Smooth Operation!
How to Check Motherboard for Compatibility?
Before upgrading or repairing your PC, always check your motherboard’s compatibility with other hardware. This is especially important for:
- CPU upgrades: Ensure the new processor is compatible with your motherboard’s socket type and chipset.
- RAM upgrades: Verify that your motherboard supports the type (DDR3, DDR4, DDR5) and capacity of RAM you plan to install.
- GPU upgrades: Check the available PCIe slots and power supply compatibility before upgrading your graphics card.
FAQs:
1. How can I check my motherboard without opening the case?
You can use system tools like Windows System Information or third-party software like CPU-Z to find motherboard details without opening the case.
2. Which system tool can I use to check my motherboard?
You can use Windows System Information or the “msinfo32” command to view your motherboard’s model and manufacturer.
3. Can I check my motherboard through BIOS?
Yes, you can view motherboard information by entering the BIOS during startup, but this typically offers limited details.
4. What third-party software helps to check motherboard information?
CPU-Z and Speccy are popular third-party tools that provide detailed information about your motherboard.
5. Why is it important to know your motherboard specifications?
Knowing your motherboard specs helps ensure compatibility when upgrading components like CPU, RAM, or GPU.
6. How do I check my motherboard for compatibility with a new CPU?
Check your motherboard’s socket type and chipset to ensure compatibility with your desired CPU.
7. Can I find my motherboard model through Windows?
Yes, you can find the motherboard model by running “msinfo32” in the Windows Start menu or by using third-party software.
8. What should I do if I can’t find my motherboard model?
You can physically inspect the motherboard for printed labels or use a tool like CPU-Z for detailed information.
9. Why is knowing the socket type of my motherboard important?
The socket type determines which CPUs are compatible with your motherboard, essential for processor upgrades.
10. Can I update my motherboard’s BIOS without knowing the model?
No, you need to know your motherboard model to download the correct BIOS update from the manufacturer’s website.
Conclusion:
In conclusion, checking your PC motherboard is essential for understanding its specifications and compatibility with hardware upgrades. Utilizing built-in system tools or third-party software makes this process simple and efficient. By knowing your motherboard model and details, you can make informed decisions for enhancing your PC’s performance and functionality.
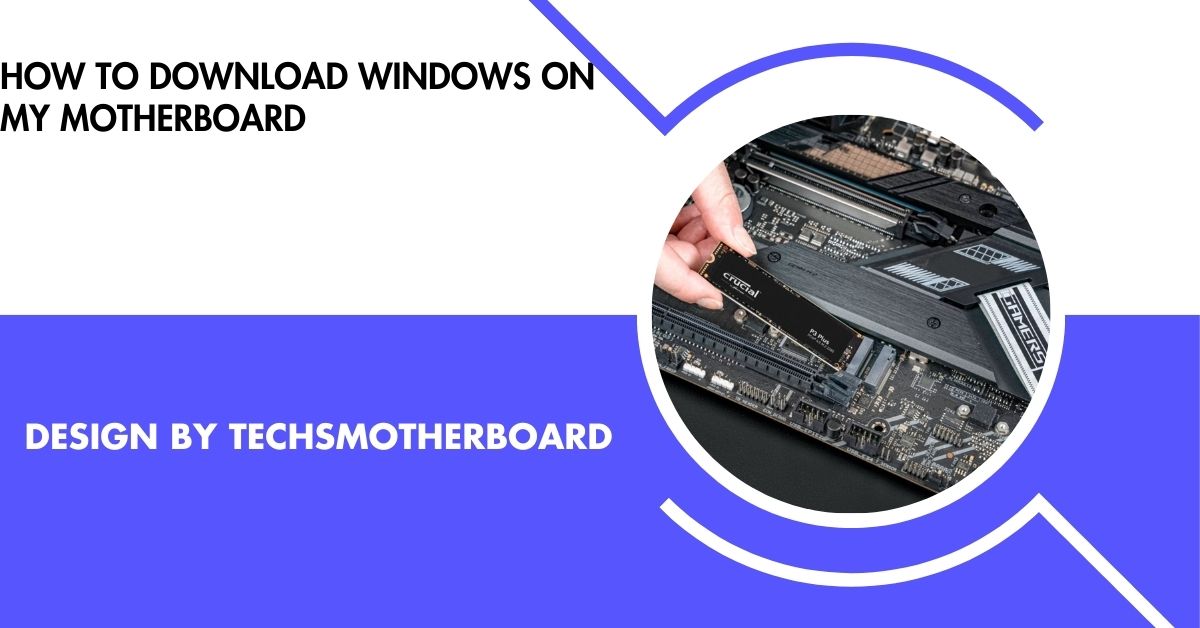
Visit the Microsoft website, download the Media Creation Tool, create a bootable USB, and boot from it to install Windows on your motherboard.
In this guide, we’ll walk you through the steps you need to take to download Windows and install it on your motherboard with ease.
What You Need Before Installing Windows:
Before you start the installation process, it’s important to make sure you have all the necessary tools and preparations in place. Here’s a checklist:
- A Valid Windows License Key: You will need a valid Windows product key to activate the operating system.
- A USB Flash Drive: At least 8GB in size is recommended to create a bootable installation drive.
- A Windows PC or Laptop: You’ll need another computer to download the Windows ISO file and prepare the installation drive.
- Internet Connection: A stable internet connection is necessary for downloading the installation files and any updates during installation.
- Motherboard with a Compatible Processor: Ensure your motherboard is compatible with Windows. Most modern motherboards are, but it’s always good to check the specifications.
Why Do You Need a Motherboard for Windows Installation?
The motherboard is the central hub of your computer. It’s where all the critical components, such as the processor, memory, and storage devices, are connected. Installing Windows on your motherboard means setting up the operating system to work seamlessly with all the hardware components installed.
In the next sections, we’ll show you the steps to follow for downloading and installing Windows on your motherboard.
Download the Windows ISO File:
The first step in installing Windows on your motherboard is downloading the Windows ISO file. The ISO file is a digital copy of the Windows operating system that you’ll later use to create a bootable USB drive.
How to Download Windows from Microsoft’s Official Website:
- Visit the Microsoft Website: Go to the official Microsoft website by typing “Windows download” in your search engine or directly visiting Microsoft’s Windows Download Page.
- Select the Windows Version: Choose the version of Windows you want to install. Windows 10 and Windows 11 are the most common choices, so make sure you select the right one for your needs.
- Download the Media Creation Tool: Click on the “Download tool now” button for the Media Creation Tool. This is a small program that helps you create the installation USB.
- Run the Tool: After downloading the tool, run it on your computer. You’ll be asked to accept the terms and conditions.
- Select “Create Installation Media”: Choose the option “Create installation media for another PC” and click Next. You’ll be asked to choose the language, edition, and architecture (32-bit or 64-bit) for your Windows version. Most modern systems use 64-bit, so ensure that you select it.
- Choose USB Flash Drive: Next, select the USB flash drive option. Ensure the drive is empty, as all data will be erased during the process.
- Wait for the Download: The tool will start downloading Windows and transfer the installation files to the USB drive. This might take some time depending on your internet speed.
Also read: Can Your Motherboard Use Any Ssd – A Complete Guide!
Prepare the USB Drive for Installation:
Once the download is complete, your USB flash drive will be set up as a bootable device. This means you can use it to start the Windows installation on your motherboard. Now, let’s prepare your computer to boot from the USB drive.
How to Set Your Computer to Boot from USB:
- Insert the USB Flash Drive: Insert the USB drive into one of the USB ports on your computer.
- Access BIOS/UEFI Settings: To make the computer boot from the USB drive, you need to access the BIOS or UEFI settings. Restart your computer and press the designated key (usually F2, DEL, or ESC) during the boot process. This key can vary depending on your motherboard, so refer to the motherboard manual if you’re unsure.
- Change Boot Order: Once you’re in the BIOS/UEFI settings, navigate to the “Boot” or “Boot Order” section. Use the arrow keys to select the USB drive as the first boot device. Save the changes and exit the BIOS/UEFI.
- Restart the Computer: After exiting the BIOS, your computer should restart. It will now boot from the USB drive and begin the Windows installation process.
Install Windows on Your Motherboard:
After booting from the USB drive, you’ll see the Windows installation screen. Now, you can start the installation process.
How to Install Windows:
- Select Language and Preferences: The installation wizard will ask you to choose your language, time zone, and keyboard layout. Select the appropriate options and click Next.
- Start the Installation: Click Install Now to begin the installation process. You’ll be prompted to enter the product key. If you have one, enter it; otherwise, you can skip this step and enter it later.
- Choose Installation Type: You’ll be asked whether you want to upgrade an existing version of Windows or do a clean installation. Select Custom: Install Windows Only if you want a fresh installation.
- Select the Hard Drive: The next step is to select the drive where Windows will be installed. If your computer has multiple drives, choose the one you want to use for the installation. If necessary, format the drive by selecting Drive Options and choosing Format.
- Wait for the Installation: Windows will start installing on your motherboard. This process can take some time, depending on the speed of your computer and the drive. Your computer will restart multiple times during the installation.
- Set Up Windows: After the installation is complete, your computer will reboot into Windows. Follow the on-screen instructions to complete the setup, including creating a user account and setting up your preferences.
Install Drivers for Your Motherboard:

Once Windows is installed, it’s time to make sure everything works properly by installing the necessary drivers. Drivers are software that allows your hardware to communicate with your operating system.
How to Install Drivers:
- Visit the Motherboard Manufacturer’s Website: Go to the website of your motherboard’s manufacturer (e.g., ASUS, MSI, Gigabyte, etc.).
- Find the Drivers Section: Search for the “Support” or “Downloads” section, and select your motherboard model.
- Download the Drivers: Download the drivers for your motherboard’s chipset, network, audio, and other components. These drivers will help ensure your hardware works smoothly with Windows.
- Install the Drivers: Once the drivers are downloaded, open the installation files and follow the on-screen instructions to install them.
- Restart the Computer: After installing the drivers, restart your computer to ensure all changes take effect.
Activate Windows:
To fully enjoy all the features of Windows, you’ll need to activate it using a valid product key. If you didn’t enter the product key during installation, you can do it after the setup is complete.
How to Activate Windows:
- Open Settings: Click on the Start menu, then go to Settings (the gear icon).
- Go to Update & Security: In the settings window, click on Update & Security, then select Activation from the left menu.
- Enter the Product Key: If you have a valid product key, click on Change Product Key and enter the key.
- Activate Windows: After entering the product key, click Next and follow the prompts to activate Windows.
How do I download a window operating system?
To download a Windows operating system, visit the official Microsoft website and select the version you want, such as Windows 10 or Windows 11. Download the Media Creation Tool, which will help you download the OS and create installation media. After running the tool, choose to either upgrade your system or create a bootable USB drive. Insert the USB into your target computer, restart it, and boot from the USB. Follow the on-screen instructions to complete the installation, ensuring you have a valid license.
FAQs
1. What do I need before installing Windows?
You need a valid Windows license key, a USB flash drive (at least 8GB), a second PC to download the Windows ISO, a stable internet connection, and a compatible motherboard.
2. How do I prepare the USB drive for installation?
After downloading the Media Creation Tool from Microsoft’s website, use it to transfer Windows installation files to the USB drive, making it bootable.
3. How do I make my computer boot from the USB?
Access your computer’s BIOS or UEFI settings during startup, change the boot order to prioritize the USB drive, save the changes, and restart the computer.
4. What should I do after installing Windows?
Install necessary drivers from the motherboard’s manufacturer website, restart your computer, and then activate Windows using your product key.
5. Can I skip entering a product key during installation?
Yes, you can skip entering the product key during installation and enter it later through the Windows settings.
Conclusion
In conclusion, downloading and installing Windows on your motherboard is a straightforward process that involves creating a bootable USB drive using the Media Creation Tool. Once you’ve set up the USB drive and booted from it, the installation of Windows is simple and can be customized to your preferences. Don’t forget to install the necessary drivers and activate your Windows for full functionality.
Related post
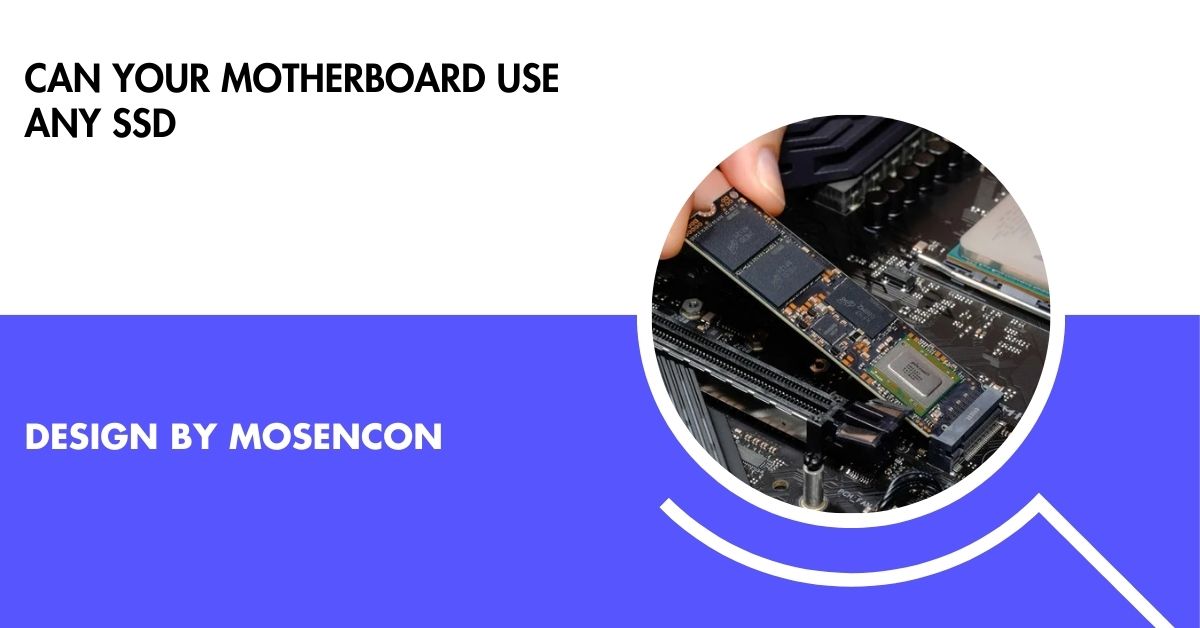
Not all SSDs are compatible with every motherboard. You must check if your motherboard supports the specific SSD interface (SATA, NVMe, M.2) and required slots.
This article will help you understand the compatibility between motherboards and SSDs and guide you in choosing the right one.
What is an SSD?
Before diving into compatibility, let’s first understand what an SSD is. An SSD (Solid-State Drive) is a type of storage device that uses flash memory to store data. Unlike traditional Hard Disk Drives (HDDs), which use spinning disks to read and write data, SSDs have no moving parts. This makes them faster, more durable, and energy-efficient.
SSDs come in various forms, including SATA SSDs, NVMe SSDs, and M.2 SSDs, each with different interfaces and speed capabilities. While all these types offer faster performance than HDDs, their compatibility with your motherboard depends on several factors.
Types of SSDs and Their Interfaces:
SATA SSDs:
SATA SSDs are the most common type and use the same interface as traditional hard drives (HDDs), making them easy to install and widely compatible with most motherboards. They offer solid performance improvements over HDDs but are slower compared to other SSD types like NVMe. SATA SSDs are ideal for users looking for a cost-effective upgrade from an HDD without requiring a specialized motherboard or high-speed storage needs, offering a balanced option for general computing.
NVMe SSDs:
NVMe SSDs deliver significantly faster data transfer speeds compared to SATA SSDs. They utilize the PCIe (Peripheral Component Interconnect Express) interface, which allows for much higher bandwidth. Designed for high-performance tasks like gaming, video editing, or data-heavy applications, NVMe SSDs can provide a substantial speed boost. However, they require specific motherboard slots with PCIe lanes, meaning that not all systems can support them. Users need to ensure their motherboard has the appropriate slot for NVMe.
M.2 SSDs:
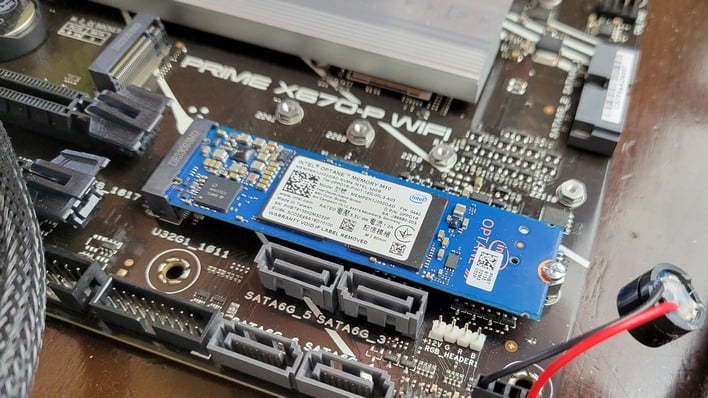
M.2 is a physical form factor for SSDs, and both SATA and NVMe SSDs are available in this format. The M.2 slot on the motherboard can support either SATA or NVMe SSDs, depending on the motherboard’s capabilities. M.2 drives are more compact than traditional 2.5-inch SATA SSDs, often providing faster performance, especially with NVMe. However, not all motherboards have M.2 slots, particularly older models, so it’s crucial to check compatibility before choosing an M.2 SSD.
Also read: Can You Split Motherboard RGB Header – Simple Guide!
How to Check If Your Motherboard Supports SSDs:
Check the Interface and Slot Type:
To ensure compatibility with your SSD, start by checking whether your motherboard supports the SSD interface. For a SATA SSD, your motherboard should have SATA ports. If you’re using an NVMe SSD, your motherboard must have an M.2 slot that supports PCIe. This step is crucial because the interface dictates the data transfer speed and type of connection your system will utilize. Always verify the correct slots are available before purchasing an SSD.
Verify M.2 Slot Compatibility:
M.2 slots can support either SATA or NVMe SSDs, but not all M.2 slots are the same. Some older motherboards only support SATA M.2 SSDs, while others may support NVMe SSDs. To find out what type your motherboard supports, consult the motherboard’s manual or check online specifications. Understanding the capabilities of your M.2 slots ensures that you select the right SSD type, whether you’re looking for high performance or simply more storage.
PCIe Lanes and NVMe Support:
For NVMe SSDs, it’s important to check if your motherboard has enough PCIe lanes to support faster data transfer speeds. Some older motherboards only support PCIe 2.0, which is slower than newer PCIe 3.0 or 4.0 standards. Verify that your motherboard has PCIe slots that can fully support the speed of the NVMe SSD you’re considering. Ensuring PCIe compatibility is essential to unlocking the full potential of an NVMe SSD, especially for high-performance tasks.
Firmware and BIOS Updates:
Even if your motherboard has the correct slots for an SSD, a firmware or BIOS update may be necessary for full compatibility. Some older BIOS versions may not support newer SSD technologies like NVMe. Before installing your SSD, check for updates to your motherboard’s BIOS to ensure that the system can properly recognize and utilize the new storage device. Keeping your BIOS up to date ensures optimal performance and compatibility with modern SSDs.
Motherboard and SSD Compatibility: Key Considerations
SSD Storage Capacity:
While most modern motherboards support large SSD storage capacities, it’s important to confirm that your motherboard can handle the size of the SSD you plan to install. For instance, NVMe SSDs with large storage capacities require specific motherboard support. Ensure that your motherboard has the necessary interface and slots to support the SSD size, particularly for high-capacity drives. Checking your motherboard’s specifications will prevent issues like inadequate storage support and ensure compatibility with your desired SSD.
Form Factor and Size:
The physical size and form factor of an SSD are crucial when selecting the right one for your motherboard. A standard 2.5-inch SATA SSD fits most motherboards, while NVMe SSDs come in different M.2 form factors, with 2280 being the most common (22mm wide, 80mm long). However, some motherboards support alternative M.2 sizes, such as 2230 or 22110. Verify the M.2 slot on your motherboard to ensure that the SSD’s form factor is compatible before purchasing.
Cooling Requirements:
High-performance NVMe SSDs tend to generate more heat than SATA SSDs, especially during gaming or intensive applications. To ensure proper performance and longevity, your motherboard should ideally have cooling options for the SSD. Many modern motherboards include heatsinks for M.2 slots, but older models may lack this feature. If your motherboard doesn’t have a built-in heatsink, consider purchasing a third-party heatsink to manage temperatures and prevent thermal throttling, ensuring your SSD runs optimally.
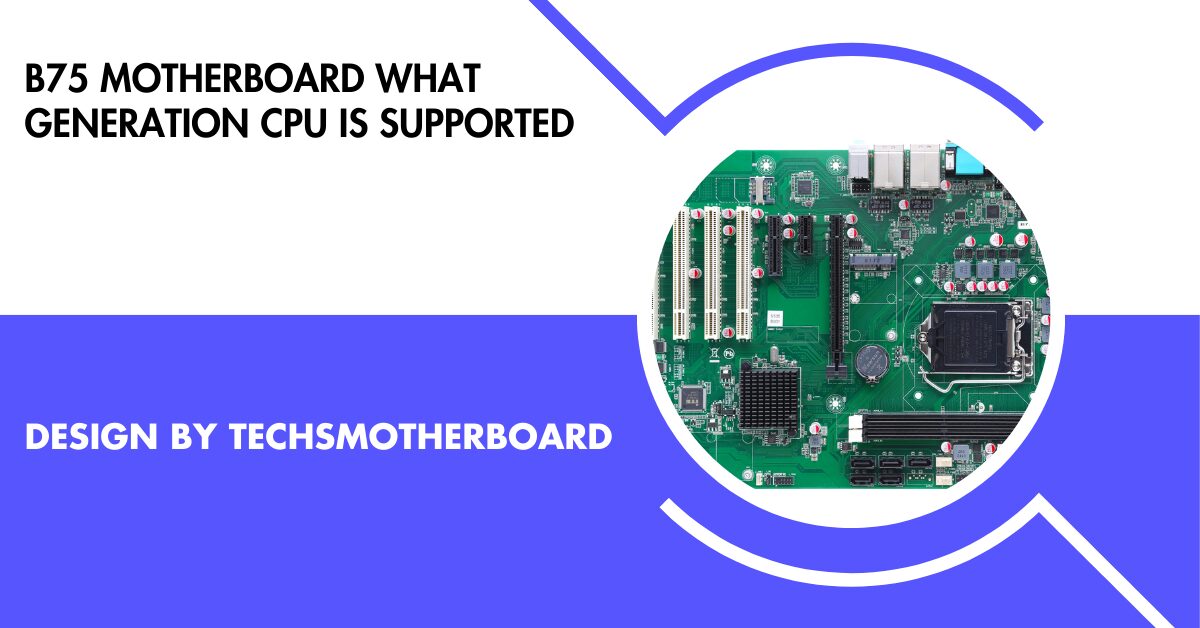
Also read: B75 Motherboard What Generation Cpu Is Supported – B75 Motherboard Cpu Support!
How to Install an SSD on Your Motherboard:
Once you’ve confirmed that your motherboard supports the SSD you’re considering, the installation process is usually straightforward.
- Install a SATA SSD: To install a SATA SSD, simply connect the drive to one of the SATA ports on your motherboard using a SATA data cable. Then, connect the power cable from your power supply to the SSD. The computer should recognize the SSD once you boot it up, and you can format it using your operating system.
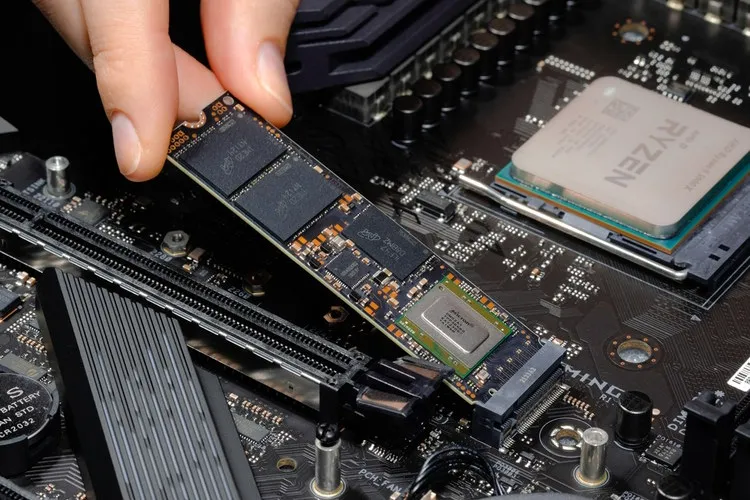
- Install an NVMe SSD: To install an NVMe SSD, find the M.2 slot on your motherboard, which is typically located near the CPU. Slide the SSD into the slot at an angle and secure it with a small screw. Once installed, boot up the system and make sure the SSD is recognized by your operating system.
Best SSDs for Your Motherboard:
Best SATA SSDs:
If your motherboard supports SATA SSDs, these options are great for overall performance and reliability:
- Samsung 860 EVO
- Crucial MX500
- Western Digital Blue 3D NAND
These SATA SSDs offer solid performance for daily tasks, gaming, and content creation, and are widely compatible with most motherboards.
Best NVMe SSDs:
For faster performance, here are some top-rated NVMe SSDs that will deliver high-speed data transfer:
- Samsung 970 EVO Plus (PCIe 3.0)
- Western Digital Black SN850 (PCIe 4.0)
- Corsair MP600 (PCIe 4.0)
These NVMe SSDs are perfect for gaming, video editing, and other demanding applications, but make sure your motherboard supports PCIe 3.0 or 4.0 for optimal performance.
FAQ’s
1. Can I use any SSD with my motherboard?
No, your motherboard must have the appropriate interface and slots (SATA, M.2, PCIe) to support the SSD type you want to use, ensuring proper compatibility.
2. How do I know if my motherboard supports NVMe SSDs?
Check if your motherboard has an M.2 slot supporting PCIe and verify its specifications to confirm it supports NVMe SSDs. This ensures compatibility with faster, high-performance drives.
3. What is the difference between SATA and NVMe SSDs?
SATA SSDs are slower but more universally compatible, while NVMe SSDs provide faster speeds. NVMe requires specific motherboard slots with PCIe lanes to support its faster data transfer.
4. Can I install an SSD without a special slot on my motherboard?
If your motherboard lacks M.2 or PCIe slots, you can still use a SATA SSD if there’s a compatible SATA port available, offering an easier installation without special slots.
5. Is there a size limit for the SSD I can use with my motherboard?
Yes, some older motherboards may have size or capacity limits for SSDs. It’s important to review your motherboard’s specifications before purchasing to ensure compatibility with your desired SSD.
Conclusion
Not all SSDs are compatible with every motherboard. Ensure your motherboard supports the correct interface (SATA, NVMe, M.2) and has the necessary slots. Reviewing your motherboard’s specifications is key when choosing an SSD to guarantee compatibility, performance, and smooth installation for your system upgrade or build, helping to avoid potential issues with fit or speed.
Related post
Specialized Motherboard
Will Your Motherboard Brick If Turned Off When Updating Bios – Bios Update Tips!
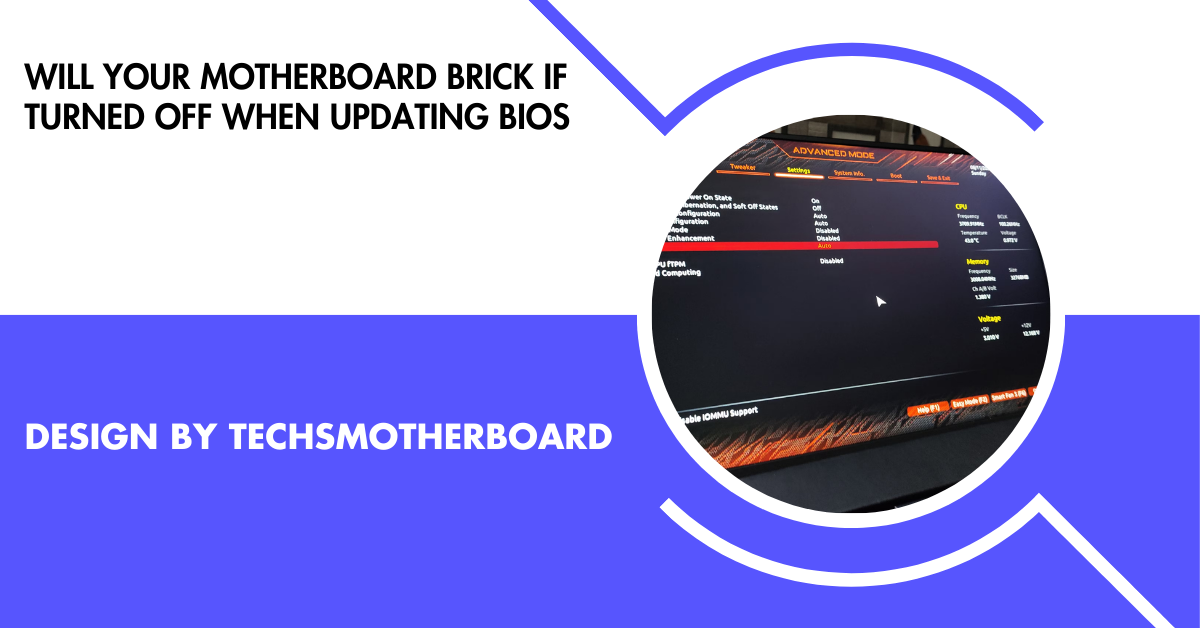
Turning off your motherboard during a BIOS update can brick it, as interruptions may corrupt the BIOS, preventing your system from booting.
In this article, we’ll explain everything you need to know about this issue in simple terms.
What Is a BIOS Update?
Understanding BIOS:
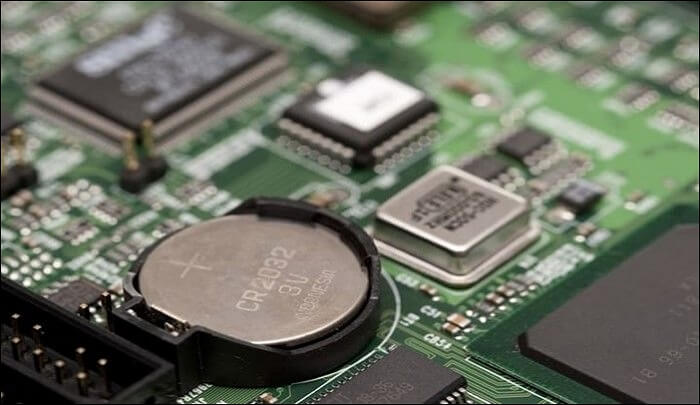
The Basic Input/Output System (BIOS) is a fundamental program stored on your computer’s motherboard. It manages hardware initialization during startup and facilitates communication between the operating system and various hardware components, such as the CPU, RAM, storage devices, and more. BIOS is critical for the system’s functionality, ensuring everything works correctly. Without it, the computer wouldn’t be able to properly boot up or interact with its internal hardware components.
Why Update the BIOS?
Updating your BIOS can address various issues, such as fixing bugs or errors that affect system performance. It can also add compatibility for newer hardware, like processors or RAM, allowing your computer to support the latest technology. BIOS updates can improve system stability and functionality, enhancing the overall performance of your computer. However, BIOS updates should be performed with caution, as improper updates can cause system malfunctions.
What Happens During a BIOS Update?
The Process of Updating
When you update your BIOS:
- The update rewrites the old BIOS program with a new one.
- The process erases and replaces critical data stored in the BIOS chip.
- It requires uninterrupted power to complete safely.
Why Is Power Important?
Power is crucial during a BIOS update because any interruption, such as a power outage or system shutdown, can prevent the BIOS from being fully installed. An incomplete installation may corrupt the BIOS, leading to a non-functional motherboard. This can result in the system being unable to start or boot properly. To avoid such issues, it’s essential to ensure a stable power supply during the entire update process.
What Does “Bricking” Mean?
“Bricking” refers to a situation where a device, such as a motherboard, becomes completely non-functional, like a brick. A bricked motherboard is unable to boot or operate properly. This can occur if the BIOS update is interrupted, such as during a power failure or shutdown, or if an incorrect version of the BIOS is installed. In both cases, the motherboard may be left unusable, requiring professional repair or replacement to restore functionality.
Will Your Motherboard Brick If Turned Off During a BIOS Update?
Yes, turning off your motherboard or losing power during a BIOS update can lead to bricking. The update process is crucial for properly installing the BIOS, and if interrupted, it can result in an incomplete or corrupted installation. This leaves the system unable to function and may prevent the motherboard from booting. To avoid this, ensure a stable power supply throughout the BIOS update process to prevent potential damage.
How to Avoid Bricking Your Motherboard:
Use a Reliable Power Source:
To prevent interruption during a BIOS update, connect your computer to a reliable power source. Consider using an Uninterruptible Power Supply (UPS) to protect against sudden power cuts. This ensures the update process continues smoothly, reducing the risk of a corrupted BIOS. A stable power supply is essential to avoid system failure or motherboard damage, which could occur if power is lost mid-update.
Follow Manufacturer Instructions:
Always follow the manufacturer’s specific instructions when performing a BIOS update. Each motherboard brand has its own recommended procedure. By reading the user manual or checking the official guidelines, you ensure the update is performed correctly. Incorrect steps or skipping essential instructions may result in serious issues like a bricked motherboard. Properly following the manufacturer’s advice ensures the update process goes smoothly and safely.
Also Read: Are B650 Motherboard A Good Choice – A Complete Guide!
Check for Compatibility:
Ensure that the BIOS update file you download matches your motherboard model. Installing the wrong update can lead to critical errors and system failure. Always check the motherboard’s model number and verify the BIOS version from the manufacturer’s website. Compatibility is crucial, and using the incorrect BIOS version can permanently damage the motherboard, making it unresponsive and potentially unrepairable.
Avoid Interruptions:
Do not turn off or restart your computer during the BIOS update process. Interrupting the update can result in an incomplete or corrupted installation, potentially causing a bricked motherboard. Any disruption to the update process may prevent your system from booting properly, leaving it unusable. Let the BIOS update finish without interference to ensure that it installs correctly and that your motherboard continues to function as intended.
What to Do If the BIOS Update Fails?
Try a BIOS Recovery Feature:
Many modern motherboards come with a BIOS recovery feature, such as Dual BIOS or BIOS Flashback. These features allow you to reinstall or repair the BIOS using a backup version stored on the motherboard. To use this, follow the manufacturer’s instructions carefully, as the process may differ between models. This can help restore your system to a functional state without needing professional assistance.
Contact Customer Support:
If your BIOS update fails, contact the motherboard manufacturer’s support team for guidance. They can offer troubleshooting steps, provide firmware recovery options, or recommend solutions. Manufacturer support is an essential resource for resolving issues related to BIOS failures. They can help ensure the issue is properly diagnosed and provide the correct steps to recover the system, potentially saving you time and preventing further damage.
Seek Professional Help:
If the BIOS recovery tools don’t work, it’s best to seek professional help. A technician or specialized repair service can assess the situation and perform advanced recovery procedures. They may be able to reflash or replace the BIOS chip to restore functionality. Taking your motherboard to a repair service can prevent further damage and ensure the issue is resolved correctly, especially if you’re unable to fix it yourself.
FAQ’S
1. Aan turning off the system during a BIOS update damages the motherboard?
Yes, turning off the system can cause BIOS corruption, making the motherboard unusable, preventing it from booting or functioning properly.
2. How can I avoid bricking my motherboard during a BIOS update?
To avoid bricking, ensure a stable power source, use an Uninterruptible Power Supply (UPS), follow the manufacturer’s instructions carefully, and avoid interruptions during the update process.
3. What is BIOS “bricking”?
Bricking refers to a situation where the motherboard becomes non-functional due to a failed or incomplete BIOS update, often leaving it unable to boot or operate normally.
4. What should I do if my BIOS update fails?
If a BIOS update fails, use the motherboard’s recovery feature like Dual BIOS or BIOS Flashback, contact customer support, or seek professional repair services to restore functionality.
5. Can I recover my system if the BIOS update is interrupted?
Yes, many modern motherboards have built-in recovery options such as Dual BIOS or BIOS Flashback, which allow you to restore or reinstall the BIOS and recover the system.
Conclusion
Turning off your motherboard during a BIOS update can lead to bricking, making your system unbootable due to corrupted BIOS. To avoid this, ensure a stable power source, use an Uninterruptible Power Supply (UPS), and follow the manufacturer’s instructions carefully. If the update fails, use BIOS recovery features or seek professional help to restore functionality and avoid permanent damage.
-

 Tech7 months ago
Sotwe STW Explained How a Radical Platform is Redefining Online Expression
-

 Entertainment8 months ago
How Do I Turn On the Beatbot?
-
 Motherboard Guide1 year ago
Are B750 Motherboard A Good Choice – A Complete Overview!
-
 Blog1 year ago
How To Find My Motherboard Model And Bios Version – A Detailed Overview!
-
 Motherboard Guide1 year ago
Are Gigabyte Motherboards Good – A Comprehensive Review!
-
Motherboard Guide4 months ago
The Ultimate Croatia Travel Guide for First-Timers: Everything You Need to Know Before You Go
-

 Blog4 months ago
Her Love Is A Kind Of Charity Password – The Hidden Meaning Behind the Phrase!
-
 Motherboard Guide1 year ago
B75 Motherboard What Generation Cpu Is Supported – B75 Motherboard Cpu Support!